Wednesday, 5 August 2015

Weaving directly onto metal

Since I started using the weaving technique I have woven separate strands (as seen below) and then attaching them onto a structure, as a way to fill it up.

Silver and copper wire woven using the "inhlandla stitch"

What I have experimented with recently is creating a structure that I weave directly onto. This will eliminate the worry of soldering and other issues such as accidentally melting the wire. clean up will be made easier too.

The image on the left is the wire structure that I wanted to weave onto. The image on the right is the weaving as is began. As can be seen, the results are not favourable so I had to repeat this step one more time, paying attention to neatness of the wire, thickness of wire and separation of wire.
  • Wire thickness: 0.6 mm
  • Metal used: Sterling silver and copper.
I tried another experimental piece, this time I was careful with how I attached the wires to the thick wire structure and I was patient with each weave.

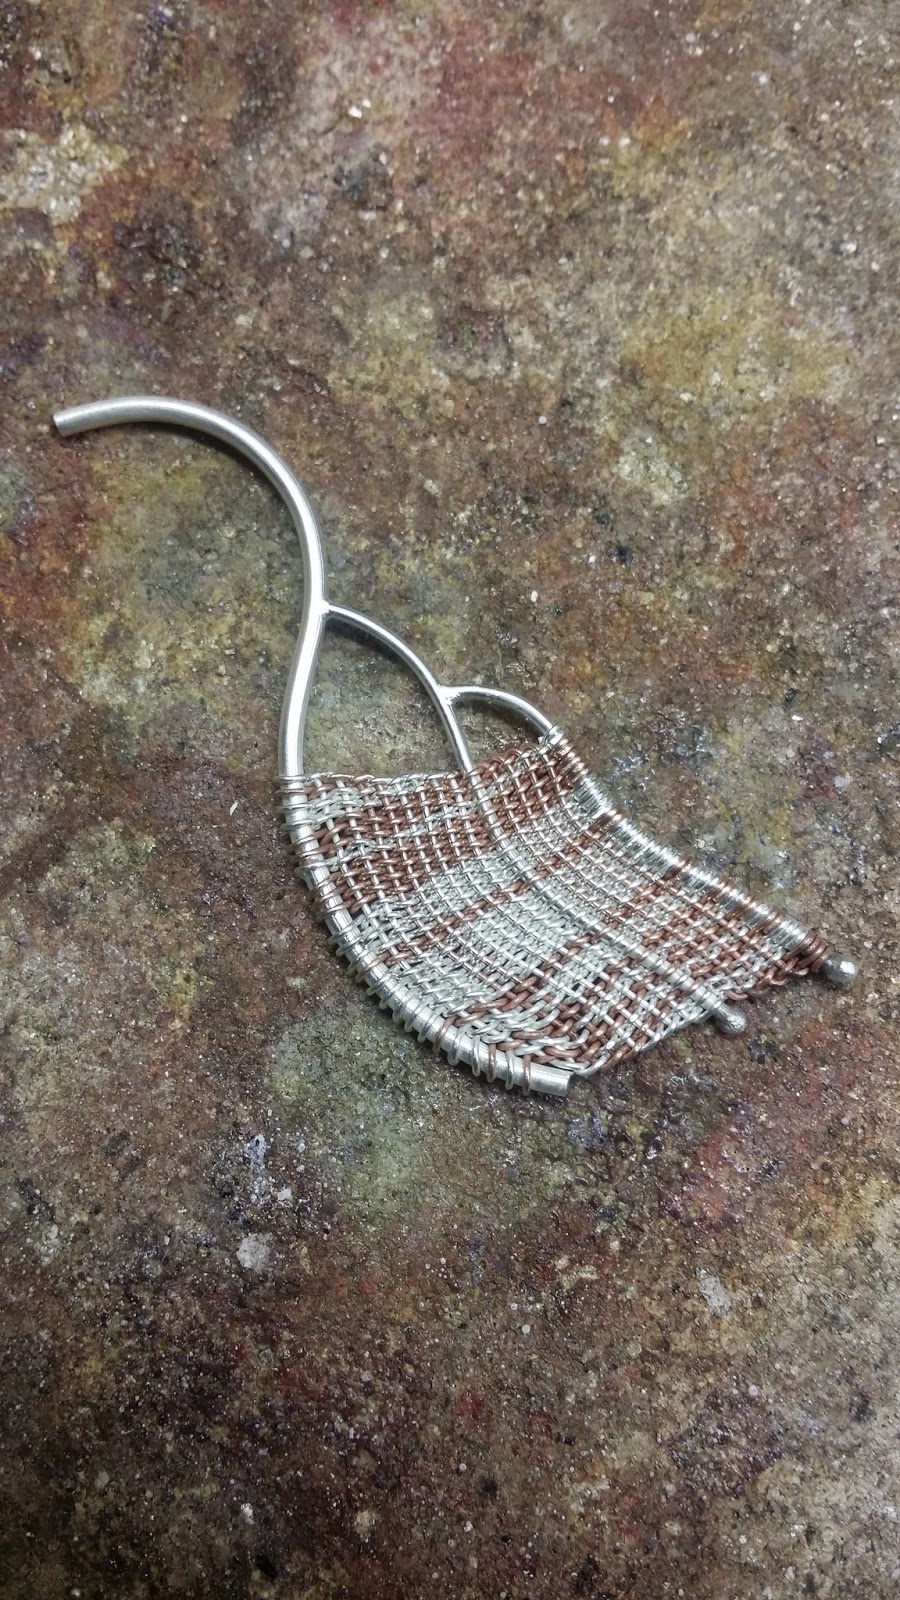
I started the process of weaving onto the piece for a second time. I went up until 9 levels or so. At this point I soldered another piece of wire to the original structure. This wire has 2 functions, it adds to the overall structure of the piece and it acts as a spine for the current weave.

  • Wire thickness: 0.4 mm
  • Metal used : Sterling silver and copper
I continued the weave from the second soldered wire. I wove up a further 5 levels and added a third wire which was used to  finish the piece off

Tuesday, 12 May 2015

Peacock feather ring


In order to take my designing to a higher more complex level I had to incorporate layering into my work. I've been focusing on nature, more specifically feathers. I decided to work with the peacock feather.

INSPIRATION

The peacock feather seemed like a good choice because the layers did not only begin an end with the physical arrangement of the feathers but the colours on the feathers are also layered.

REFERENCE DRAWINGS


Reference drawings of birds and feathers. I was drawn to the form of the feathers and thought it would make for interesting jewellery.

I did some drawing exercises of  some feathers so I could loosen my hand and gain confidence in my ability to draw feathers.


RING

I Pierced out the frame and added the sawn out jump rings with granules. These represent the head of the feather/attracting feature of the peacock feather.


The focus of this piece is the 'eye' of the peacock feather.


I made the wire structure that fits inside the sawn out outer frame. After soldering the wire structure I domed the entire frame.


To add another element of layering I made a woven strand with a combination of silver and copper.
The backplate that was pierced to match the domed top plate that was shown above.  

I arranged the woven pattern to fill up the back plate as seen above 

I soldered the domed frame from earlier onto the backplate with the weaving. As can be seen, the domed plate subtly hides the weaving on the backplate.

The ring has a knife edge shank so I made it by melting the ends of a strip of metal then gammering the melted ends as flat as you want the knife edge then removing the excess so you can solder the ends together. (Hargreaves, 2013)

I split the shank at the top of the shank as a decorative element


The complete ring after all the elements have been soldered together

The final product

RING STAND

I used square wire to create the base of the stand. I used the same structure as the protea ring I made earlier


I bent the side frames as oranically as possible also making sure the ring would sit comfortably as possible.


The stand needed some visual weight so  I made some components that are meant to resemble the "eye" of a peacock feather


I soldered the elements together and arranged them in a way that I will solder them on the rest of the stand


The ring stand after the elements were added onto it.


Top View


Side view

CAD Process

The following series of images shows the steps followed in CAD leading up to the final rendered product.

I used curves to draw the  outline  of the top of the ring. I used an arrangement of ellipses and then trimmed what was necessary


From the curves that were left over after extruding, I started to build
 the inner frame.


I polar arrayed the initial solids that I created 8 times.


Perspective view so far.


Using the same curves that built that top of the frame, I created the bottom of the frame. I obviously did not boolean difference the middle out.


I created the ring shank with a slip feature on top. I used the 2 sweep rail tool to create the taper.


I created the weaving by drawing lines that I edited using control points. I made 2 vertical lines and 2 horizontal lines. The reason for creating 2 is because I can easily copy the rest.


I changed the layer colours to resemble the materials used. I bent the woven strip and arranged the multiple copies of the strip on the inside of the frame.


I covered it up as it should be and this is what the complete ring looks like


To create the stand, I drew the shape of one side of the frame using the arc tool and offsetting it inwards by 1.5mm. I drew the base of the stand using the circle tool and offsetting it by 1.5mm.


I extruded the curve I created above, bent it slightly so it resembles the actual piece then I polar arrayed it 3 times around the base .


To create the "eye" of the peacock feather I drew 2 circles and placed one circle on top of the other. I trimmed the parts that aren't needed so that I could extrude the curve.


I extruded the curve and created 2 solid spherical solids that I placed on the extruded curve. The spherical solids represent the "eye" of the peacock feather. I polar arrayed it 3 times around the base.


The final piece when the ring and stand are separate.


The final piece when the ring and base are fitted together.

CAD Renderings

The following three images are the final rendered CAD images of the peacock feather inspired ring and ring stand


Wednesday, 1 April 2015

Protea woven ring/stand

This piece is inspired by the king protea flower. As it will be seen later,I integrated weaving within the petals to create an interesting visual texture. My work can be viewed as personal adornment when worn on the body as well as a visual artefact when off the body.


INSPIRATION


The way in which the petals overlap one another was what I found interesting. I wanted to incorporate that somehow.


I used the shape of the protea's petals to come up with the shape of the top of the ring and the stand


THE RING


The frame of the petals are made of 1.5mm thick square silver wire. The four petals are soldered together at the ends. I made 2 sets of these.


The petals are then domed. This is what it looks underneath.


This is what the domed petals look like from the top.


After having looked at various way of how the petals will be positioned on one another I decided on the position above.


The weaving stitch I used is the "inhlandla" stitch. This is the stitch that I have used in the majority of my work. It is the neatest stitch and I achieve a tighter fit between wires.


I sawed the woven strip into the shape of the inner petals and soldered them in place. 


The second petal with the woven inner petal soldered in it.


The third petal with the woven inner petal soldered in it.


The fourth and final petal with the woven inner petal soldered in it.


The top view of the petals in position. I thought of placing woven petals in the bottom silver petals like  I did with top but that would disrupt how the ring rests on the stand at the end.


Instead of just soldering the petals to one another, I also inserted a 1mm thick wire rod in the middle of the petals.


I melted the tip of the wire that is coming through the top of the petal to create a ball (As pictured above) that can be used as a handle.  I then soldered the bottom of the wire to the bottom of the bottom petal (This cannot be seen here).


The final ring after soldering the shank.


THE STAND


The frame of the stand petals are made of 1.5mm thick square silver wire, as was the case with the ring petals I made earlier. The four petals are soldered together at the ends.


I made a ring and then I soldered the four petals equally around it. The ring in the middle is the base of the stand.


I domed/bent the petals equally until they aligned with the petals on the ring. The aim is for the tops of the petals to fit into the petals on the ring. This will be seen below.


Top view of the final ring and stand when they are positioned in place.

The ring stand needed some more visual weight so I added more petals. The petals will be layered on one another.


Side view of the final ring and stand when they are positioned in place.
The purpose of my work is to create jewellery that can assume the role of personal adornment when on the body as well as a visual artefact when it off the body (Quickenden 2000:1).


CAD Process

The following series of images shows the steps followed in CAD leading up to the final rendered product.


I drew the petals using curves. I then extruded the curves to create what's pictured above. Each petal was bent to resemble what it would look like in person.


I drew the weaving using the interpolate curves and I solidified them using the pipe tool. I repeated this and arranged the piped wires as they would be if they were woven.


I drew the shank using the circle tool and I offset the inner circle outward to create the thickness of the shank. I extruded the two circles to create the shank.


The same method used to create the ring's petals was used to create the stand. I arranged the petals in a circle so that they align with the ring's petals.


Pictured above is the ring and the stand separately.


Pictured above is the ring and the stand when they are positioned in place 

CAD Renderings

The following three images are the final rendered CAD images of the protea flower inspired ring and ring stand